Setup in Windows#
This section covers how to set up BDT3 with Spark Standalone and Jupyter Notebook on a Windows system. To run BDT3 in Windows using ArcGIS Pro and ArcGIS Notebooks, please see the “Setup in Pro” section.
Requirements#
Java 17 (OpenJDK 17)
Apache Spark and Hadoop
BDT Version |
Apache Spark Supported Version |
Hadoop Supported Version |
|---|---|---|
3.0 |
3.2.2 |
3.2 |
3.1 |
3.3.x |
3.3 |
3.2 |
3.4.1 |
3.3.x |
3.3 |
3.5.1 |
3.3.x |
3.4 |
3.5.4 |
3.3.x |
3.5 |
3.5.8 |
3.3.x |
Anaconda or Miniconda
The BDT3 jar and zip files
A license for BDT3
Install and Setup Java#
Download and install Java 17 from a trusted source, e.g. Oracle or Azul.
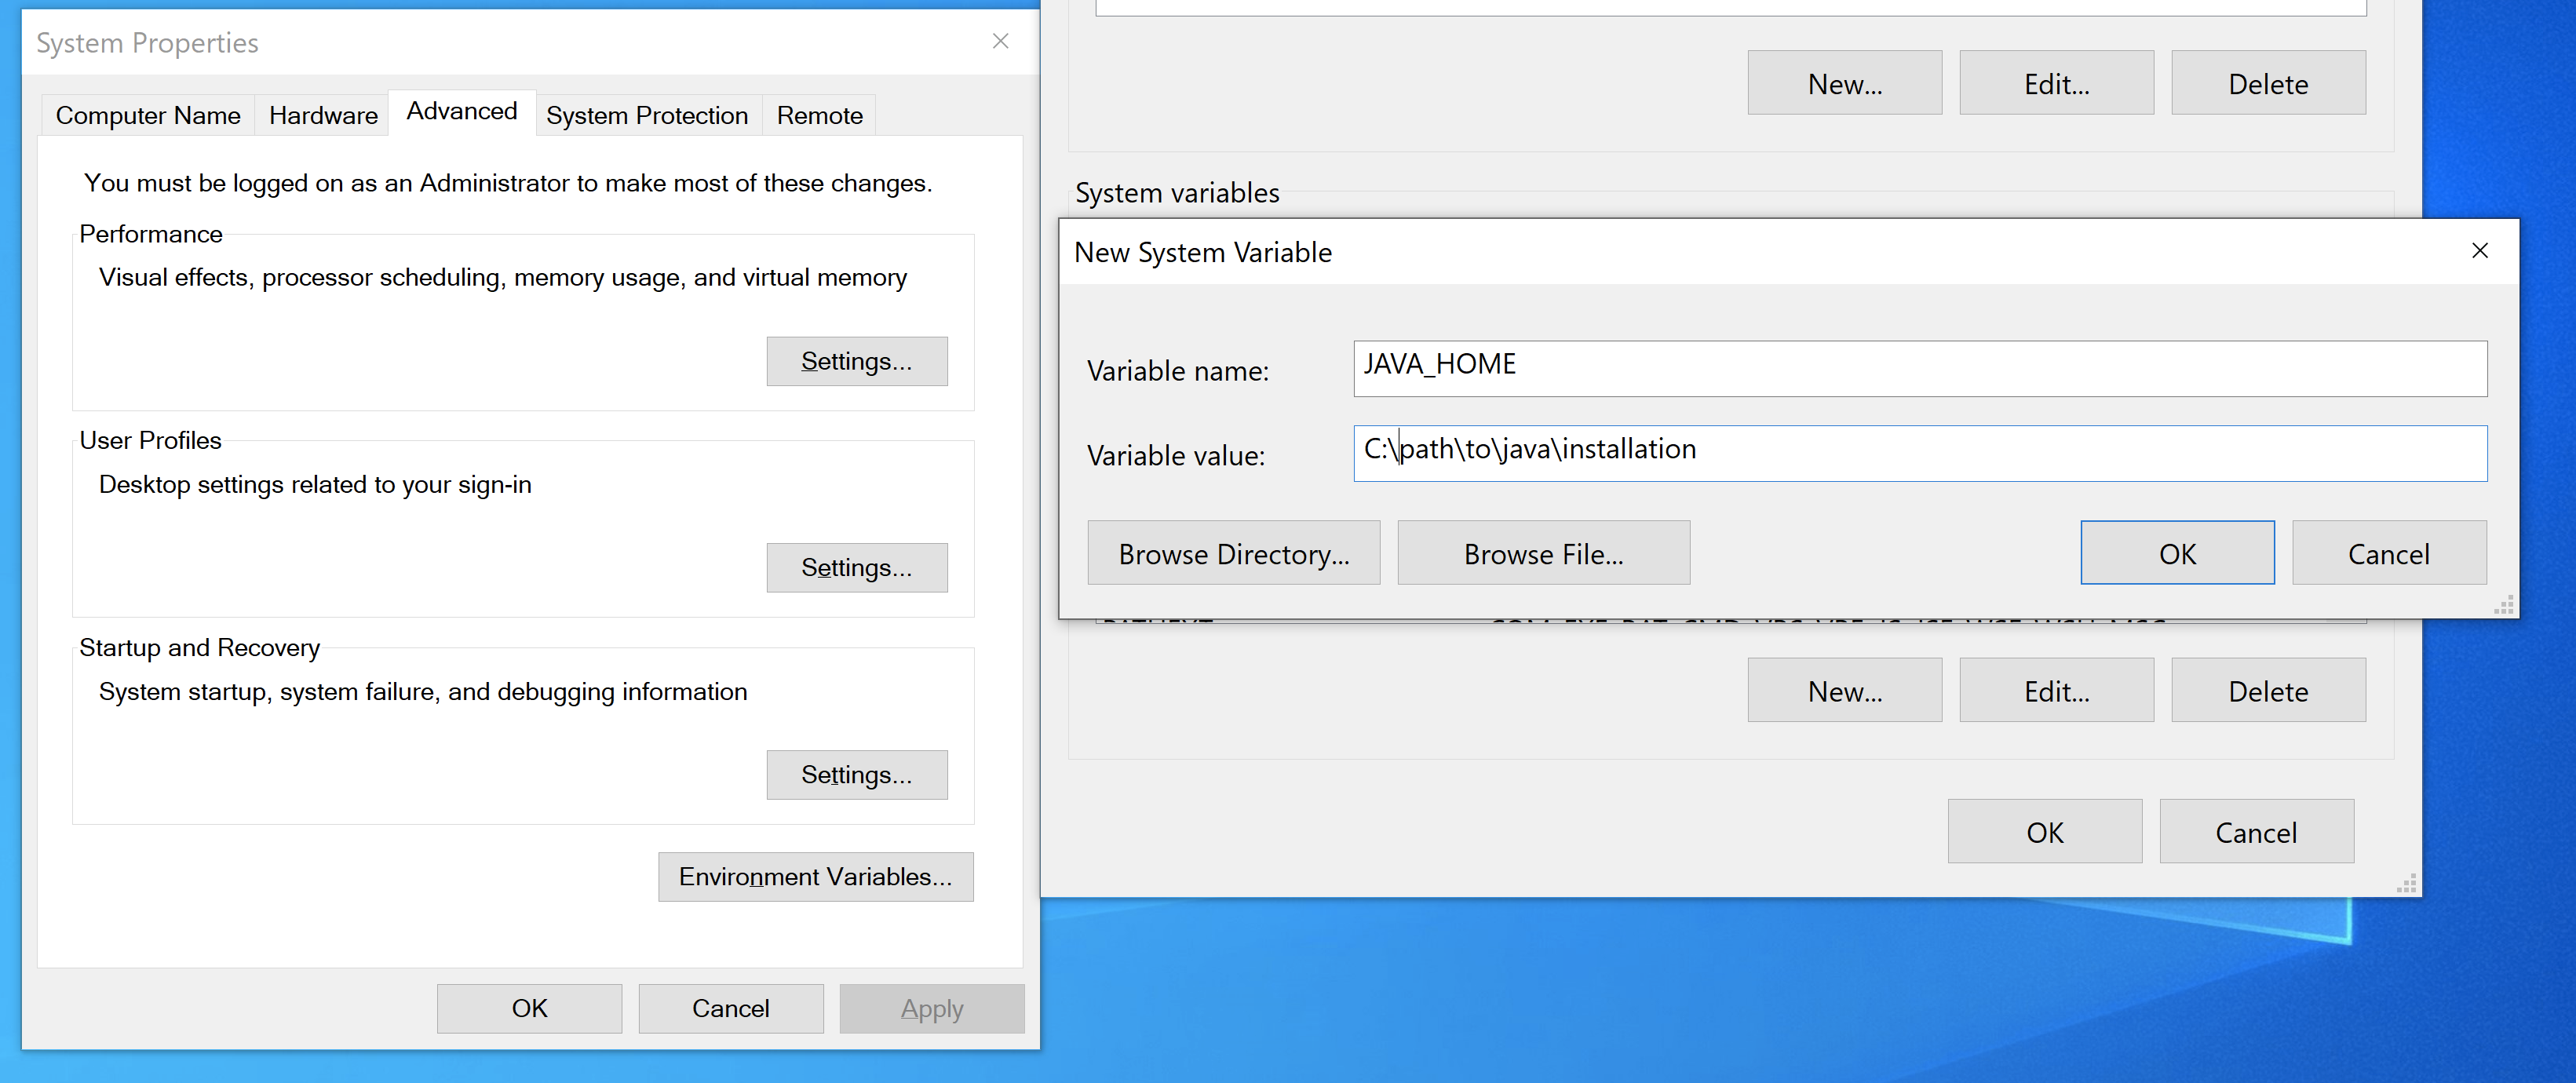
Open the Windows environment variables settings. To find the settings, type “environment variables” in the Windows search bar.
Create a new system variable called
JAVA_HOMEand point it to the location of the downloaded jdk.
Append
%JAVA_HOME%\binto thePATHsystem variable like the following:<existingpath>;%JAVA_HOME%\bin
Install and Setup Spark + Hadoop#
IMPORTANT (For BDT3 Version 3.0 Only): Spark 3.2.2 is highly recommended. Spark 3.2.1 has a known bug when calling spark-shell in Windows.
Download and extract Spark and Hadoop from here. Download 7-Zip from here to extract the
.tgzpackage. Extracting the.tgzwill create a.tar, which will need to be extracted again. Be sure to verify the downloaded release per the documentation.Create a new system variable called
SPARK_HOMEand point it to the location of the Spark and Hadoop download. Append%SPARK_HOME%\bintoPATH. DO NOT place the Spark and Hadoop download in Windows program files directory. This will cause issues with Spark and Hadoop.Create a new empty folder with the path
C:\Hadoop\bin. Visit this website and downloadwinutils.exeandhadoop.dllfor the matching version of Hadoop. Putwinutils.exeandhadoop.dllinC:\Hadoop\bin.Create a new system variable called
HADOOP_HOMEand point it toC:\Hadoop. Append%HADOOP_HOME%\bintoPATH.Create a new system variable called
PYSPARK_LOCAL_IPand set the value tolocalhost.Create a new system variable called
PYSPARK_DRIVER_PYTHONand set the value tojupyter.Create a new system variable called
PYSPARK_DRIVER_PYTHON_OPTSand set the value tolab.Create a new system variable called
PYSPARK_PYTHONand set the value topython.
Install and Setup Anaconda#
Download and install Anaconda (or Miniconda) for Windows.
Open the Anaconda Command Prompt. Create a new conda environment called
bdt3-pyand pull the default package set with the following command:conda create -n bdt3-py.Activate the
bdt3-pyenvironment:conda activate bdt3-py.Due to a known issue using Python 3.12 with Spark 3.5, Python must be downgraded to 3.11 with the following command:
conda install python==3.11.8. This may take a few minutes.Install jupyterlab:
conda install jupyterlabGeopandas is also recommended to visualize results in the notebook. Install geopandas and its supporting libraries with the below commands:
conda install pip
pip install geopandas
conda install -c conda-forge folium matplotlib mapclassify
conda install pyarrow
Ensure the
spark.sql.execution.arrow.pyspark.enabledspark config is set totrue. This is done in the init script below.
Launch Jupyter Notebook with BDT#
Create an init script by making a
.cmdcommand file. Call the init scriptinit-bdt3.cmdand put the below contents inside the script:
pyspark ^
--master local[*] ^
--driver-java-options "-XX:+UseCompressedOops -Djava.awt.headless=true" ^
--conf spark.executor.extraJavaOptions="-XX:+UseCompressedOops -Djava.awt.headless=true" ^
--conf spark.sql.execution.arrow.pyspark.enabled=true ^
--conf spark.submit.pyFiles="C:\<path>\<to>\<bdt_zip>\" ^
--conf spark.jars="C:\<path>\<to>\<bdt_jar>\"
Update
C:\<path>\<to>\<bdt_zip>\with the path to the bdt3 zip file. This file can be stored anywhere on the system.Update
C:\<path>\<to>\<bdt_jar>\with the path to the bdt3 jar file. This file can be stored anywhere on the system.If you would like to learn more about what
--confdoes, then visit the spark configuration docs here.Run
init-bdt3.cmdfrom the Anaconda Command Prompt. This will launch a jupyterlab session in the default browser with BDT installed on the environment.
Note: If you are using raster functions per the Setup for raster processing guide, there is a known issue with using the spark packages option on windows: Packages may not work on windows. This may produce null pointer exceptions in the command prompt when first running a notebook cell. However, the notebook should still run with no issues. This issue was not seen when running using a local cluster